|
|
You are here: CodenamePending>Photography Web>GeoTagging (23 Aug 2009, StephenCavilia)Edit Attach
%IMAGE{"xphoto-map.png" type="frame" align="right" href="http://xphoto.atomicradi.us/map?zoom=11&lat=54.14486&lon=-6.32246&layers=B0T" caption="Geotagged photos displayed on a map of Ireland"}%
Geotagging Photos
A geotag is a type of metadata added to a photograph or other document that identifies its geographical location. Geotagging allows new ways to display , manage, and discover images: a group of photos can be displayed on a map to visualize the photographer's journey, or spatial searches on a large database of geotagged photos can easily find images of a particular place or event. Digital photos can be easily geotagged using track logs recorded by a GPS and the digital camera's built in clock.Overview
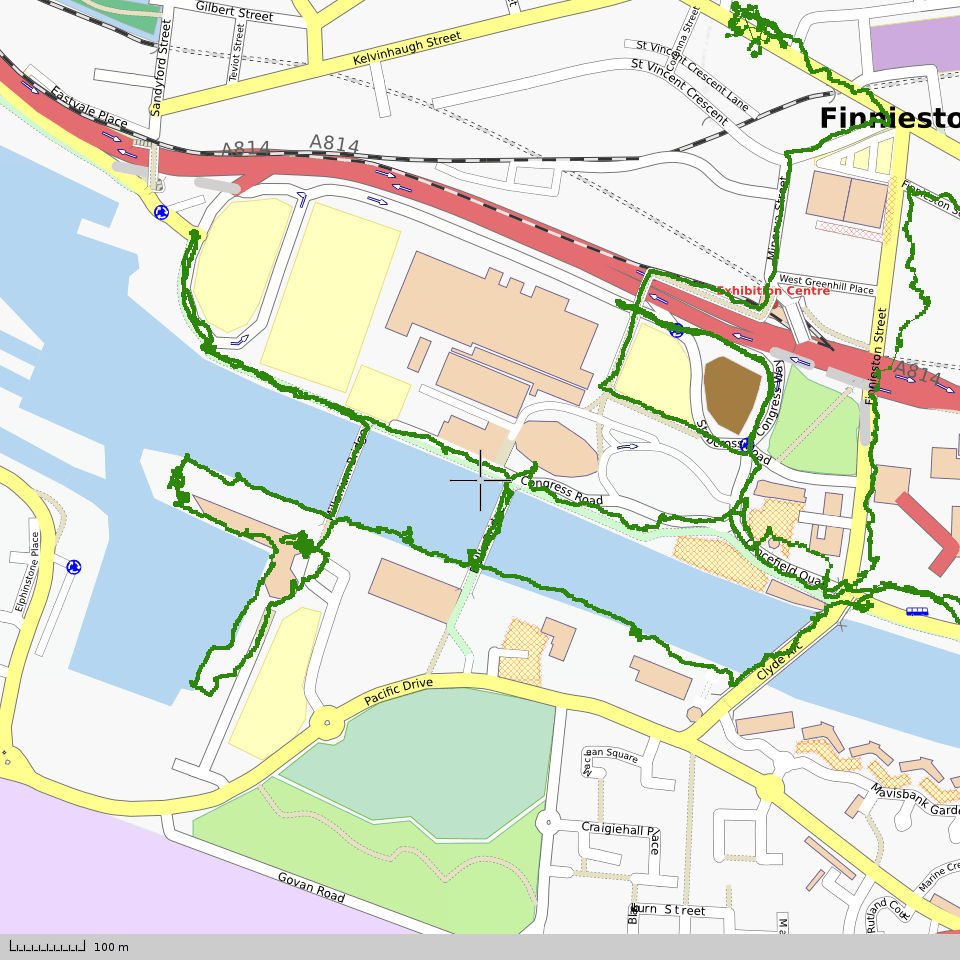
The basic process for GPS-based geotagging involves taking a picture, reading the camera's position from a GPS receiver, and recording this position with the image file. One way to do this is to have the camera and GPS in the same device; a few digital cameras and several mobile phones include a GPS receiver that can automatically geotag pictures as you take them. But if your camera only has its own clock but no GPS, you can use a separate GPS receiver to accomplish the same result using the method described here. The most obvious way to record a position for each photo is to manually store a waypoint in the GPS receiver's memory each time you snap the shutter and copy these waypoints directly to their corresponding image files. While this eliminates any clock synchronization issues, and even works on a camera with no clock, it is tedious and error prone: if you forget to record a waypoint, or record one twice, and data from that point on won't be aligned properly to your sequence of photos. A more automated way is to set the GPS receiver to store a tracklog, a continuous set of time-position samples taken at regular time or distance intervals. From this trace of the receiver's path through time and space, various kinds of analysis can be done: measuring the speed of a moving vehicle over time, calculating the length of a bike ride or run, or figuring out the exact location of every photo you took along the way. Once this data is available, computing the geotags is a straight-forward process. Since the camera records the time at which each image recorded, a software program looks up where the GPS receiver was at that time using the track log, and adds that position to the image file. For the camera time stamps and GPS logs to correlate well, both clocks must be running close enough to the same time, by either directly synchronizing them or measuring and correcting for the offset. %IMAGE{"vikingtrack.png" type="frame" align="right" size="300" caption="GPS track displayed on OpenStreetMap images"}%GPS Track Logs
The first step is to use a GPS receiver to create a record of your positions over the course of your journey. Such track logging functionality was once the norm in most GPS receivers, but is harder to find these days. That's because most GPS manufacturers are putting most of their marketing and development budgets towards devices made more or less exclusively for car navigation. TomTom devices, and even most products like Garmin's nüvi series that are designed somewhat for pedestrian use are useless here. One way to get a logging-capable GPS is to use an old-style outdoor handheld receiver; the other is to use a GPS-enabled mobile phone or PDA with proper software. Most phones now either include a GPS receiver or can connect to an external one over Bluetooth, and technically support logging software. Technically, meaning that an unlocked phone will work fine but anything bought from your carrier will probably make you jump through all sorts of hoops, including possibly throwing your phone away and buying an unlocked one. For J2ME-compatible phones or PDAs, which includes almost anything that's not a smartphone, programs like GPS Track or TrekBuddy can connect to an internal or Bluetooth GPS receiver and record track logs, "security" features imposed by Java or your phone carrier permitting. Most smartphones allow any software to be installed, but this can vary between platforms and carriers. Most GPS hardware and software will let you customize their track logging behavior by selecting a minimum time or distance interval between subsequent samples. For the best geotagging accuracy, use the shortest time interval available, which is usually 1 second, especially if you're going to be moving at high speeds.Clock Synchronization
Errors between GPS and camera timestamps will add inaccuracy to your geotags, with large time differences and high speeds causing the worst problems. After you start recording a GPS log, make sure the clocks in your camera and GPS receiver are as close to each other as possible. GPS receivers automatically synchronize themselves from satellite signals, but cameras need to be set manually. If your camera lets you set its clock with second precision (my EOS does), you can synchronize it by hand to within a few seconds of GPS time, which won't need any later correction. Otherwise, set it as close as you can so you can measure and correct the difference later. When your GPS has a stable time signal, take a picture of its screen showing the clock. This will serve as a reference image for calibrating the others. You should be aware of time zones if you hand-synchronize your camera's clock. GPS logs are usually stored in UTC, so if your camera is set to local time you'll have to take the local time zone offset into account later.Capture, Record, Upload
Turn on your GPS, wait for it to acquire a fix, start logging, and start taking photos. Take a reference shot of the GPS clock if necessary. When you get home, upload the track log and images to your computer. Download the gpsPhoto program from http://www.carto.net/projects/photoTools/gpsPhoto/.Tag your Images
Now the fun part. Run gpsPhoto.pl, telling it the location of your image files and GPS logs (these should be in GPX format, use GPSBabel to convert them if you're starting with something different) and the time offset:$ gpsPhoto.pl --gpsfile track.gpx --dir images/ --timeoffset 14400In this example, there is a single GPS log called
track.gpx, a directory of images images/ and the camera's clock is exactly 4 hours behind UTC (camera time + 14400s = GPS time). If you have multiple track log files, you can pass multiple --gpsfile options, or an entire directory with --gpsdir. Conversely, to tag a single image, use -I image.jpg. If your camera's clock is set to UTC, use a time offset of 0 seconds. Otherwise you will need to calculate it from your time zone and/or reference image. Example: if the GPS screen says 19:08:47 and the camera's time stamp is 14:09:25, the time offset would be 17962 seconds.
The first thing gpsPhoto does when it runs is read every track point from every GPS file into memory. Because this can take a long time, try not to use single GPS files or small directories containing only a few files (I keep my logs sorted into one subdirectory per month). Next it looks in every image file for an EXIF timestamp. If it finds one, it looks for a GPS track point at the same time, possibly interpolating between the two nearest points if necessary, and stores this position in the image using EXIF GPS tags.
-- StephenCavilia - 2009-08-22 

| I | Attachment | Action | Size | Date |
Who | Comment |
|---|---|---|---|---|---|---|
| |
xphoto-map.png | manage | 43 K | 22 Aug 2009 - 23:04 | StephenCavilia | |
| |
vikingtrack.png | manage | 389 K | 23 Aug 2009 - 00:43 | StephenCavilia |
Edit | Attach | Print version | History: r2 < r1 | Backlinks | View wiki text | Edit wiki text | More topic actions
Topic revision: r2 - 23 Aug 2009, StephenCavilia


Ideas, requests, problems regarding CodenamePending? Send feedback